Every teenager in my class has an electronic device that is powered by a battery. You would have difficulty finding a more relevant chemistry topic to the typical teenager than electrochemistry! This year I moved electrochemistry closer to the beginning of the course because it is the perfect follow up to the Six Types of Chemical Reactions Unit — article in Chem 13 News, December 2014/January 2015, pages 6-7. With chemical reactions still fresh in their minds, I presented electrochemistry as a “spotlight” on the single displacement reaction. This two-week unit was the perfect opportunity to introduce the activity series of metals, oxidation and reduction, and standard reduction potentials in an engaging and relevant series of hands-on activities.
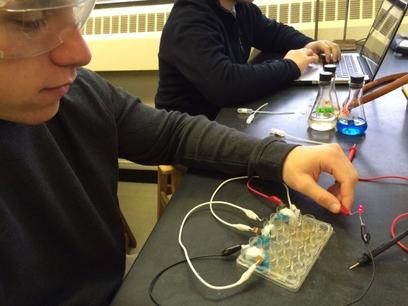
Students construct a Daniel Cell.
The activity series of metals was the bridge between the single displacement reaction and the galvanic cell. The students conducted a microscale study of the reactivity of common metals.1 We set up reactions between metals and salt solutions — including hydrochloric acid — to create an activity series. The working knowledge of the relative reactivity of these common metals was the backbone of the galvanic cells that students construct later in the week.
The magnesium-copper cell in the Hot Dog Clock demonstration2 was the first galvanic cell I introduced. This cell was easy to construct in “real time” and provided enough voltage to replace the AA battery in a clock. I used my chemistry clock, of course. Students wrote the half reactions on their white boards during the demonstration, identifying each as oxidation or reduction.
I reinforced the concept of electrons flowing from the more active to less active metal. This is a direct application of their observations of the activity series of metals — both zinc and copper were included in the activity series lab. By the end of this demonstration the students had gained experience with the construction and chemistry of a simple galvanic cell.
Armed with the basic knowledge of how a battery works, students were given a design challenge with very few instructions. They were provided with all the parts of the classic Daniel Cell:
- copper and zinc electrodes, alligator clips, a multimeter
- 1.0 M solutions of copper sulfate and zinc sulfate
- 1.0 M solution of sodium nitrate for the salt bridge
- 24-well plate
- cotton (the salt bridge was a small piece of a cotton swab)
The students were challenged to construct a battery that can generate enough voltage to light a 2.6 V LED. The students used a voltmeter to record the voltage of the cells during construction, and to monitor the voltage when more cells were added to the system. This fun activity was complete when they took a photo of the lit LED connected to their battery. The students enjoyed this hands-on activity because they didn’t know how many cells were required and they had to tinker with the system to get it to work.
You could hear cheers from lab teams when they got the LED to go on. A minimum of three cells in series was required to light the LED. This year, I had one group of boys who took this challenge to the next level by constructing a battery that produced 10 volts!
Electrochemistry is an engaging and relevant topic that is a perfect fit for any high school chemistry class. Moving up this unit in the term was a successful experiment with positive outcomes for me and for the students. I enjoyed watching the students dive deeper into chemical reactions. My students enjoyed constructing batteries from scratch and harnessing the power of a chemical reaction.
References
- Flinn ChemTopic Labs: Oxidation and Reduction
- Flinn CHEMFAX No. 91335: https://www.flinnsci.com/hot-dog-clock/dc91335/

Students designed this battery producing 10 volts.